Simulate your IEDs using SCL files
Select your SCL file
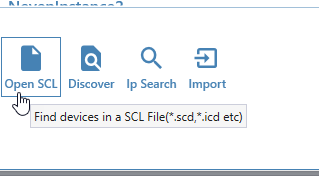
Either select the option to open a SCL file from the TSP start dialog or select the option to create a new workspace:
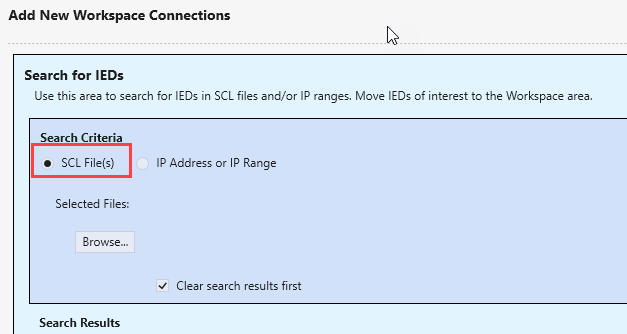
Now click "Browse" to select the SCL files (.icd, .cid., .scd, etc.). Multiple files can be selected by pressing CTRL.
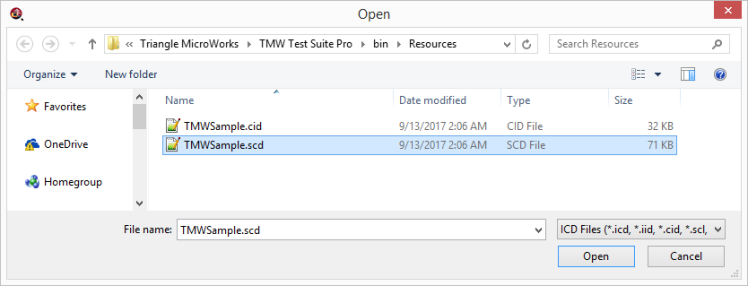
Click "Open" and Test Suite Pro will parse the SCL file and send an initial connection request to each IED found in the SCL file.
The search results will show a status for each IED based on the responses from the IEDs.
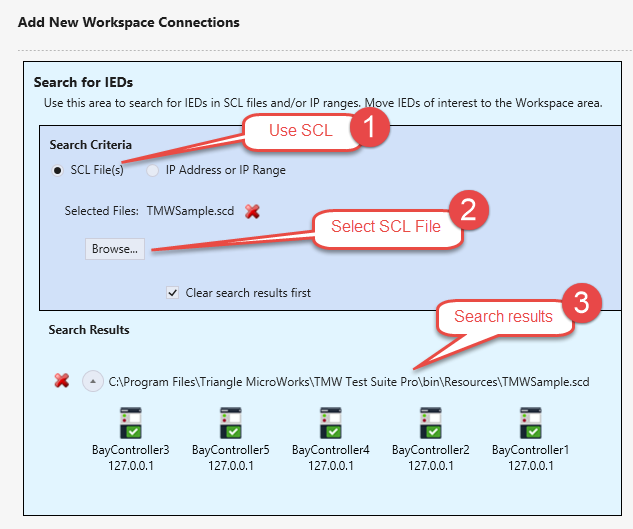
Tip: the example IED servers seen here all use the same loopback IP address (127.0.0.1) for convenience. Real IEDs will each have a unique IP address
Updating the SCL File
You can update the SCL file used in the workspace by updating the SCL file in the original windows directory from where it was loaded. A reference to the SCL file is saved in the workspace. *The SCL file is not saved in the workspace. TSP does not modify SCL files.
For example, you could edit the SCL file in the original location or you could save a new copy on top of the original. The workspace will use the new version of the file when it is reloaded.
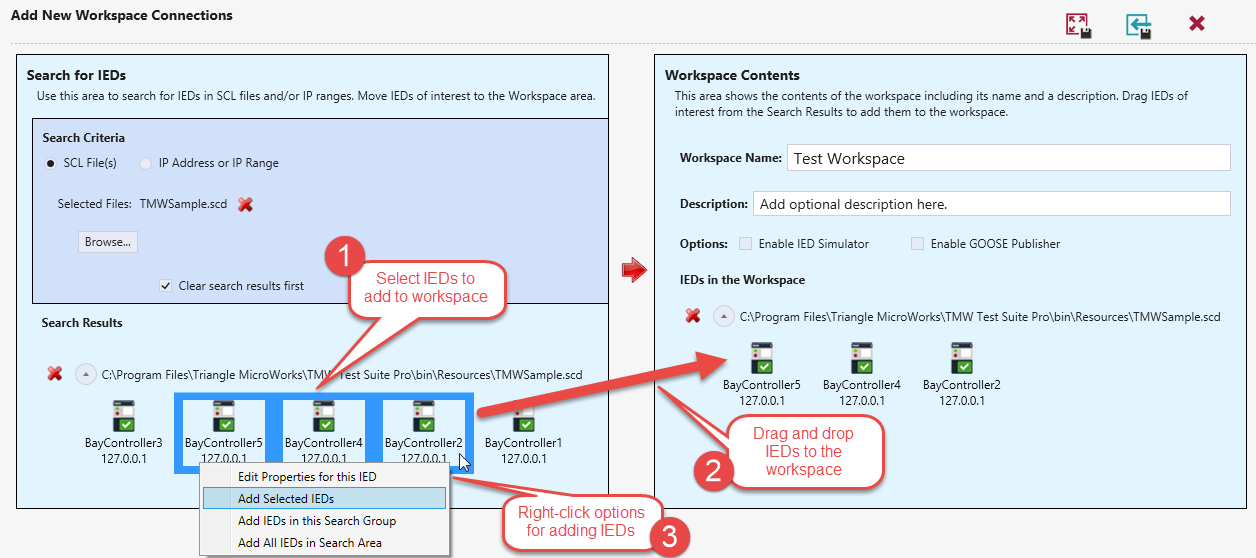
Add IEDs to the Workspace Contents
After searching for IEDs, the next step is to add IEDs to the workspace.
1) Select the IEDs to include in the workspace (multi-select IEDs by holding down Ctrl or Shift)
2) Drag and drop the selected IEDs into the Workspace Contents area on the right
OR
3) Right-click on the selected IEDs for options to add all IEDs in the search group (one SCL file) or all IEDs in the entire search area (multiple SCL files)
Simulate the IEDs
After entering your workspace with the IEDs selected in the SCL file:
- Go to the IED SimulatorIED Simulator tool (see screen shot below):
- Click on the IED drop down menu
- Select the IED you want to simulate
- Click start on the ribbon bar